How to Organize 10,000+ Photos on Your iPhone
If your iPhone photo library has crossed the five-digit mark, you are not alone. The average smartphone user takes roughly 20 photos per day, and over several years that adds up fast. The good news is that you do not need to review every single one. This guide walks through a practical system for how to organize thousands of photos on iPhone — from the first cleanup pass to long-term habits that keep the clutter from coming back.

The Overwhelm Problem
A library with 10,000 or more photos is not just large — it is psychologically paralyzing. When you open the Photos app and see a wall of thumbnails stretching back years, the instinct is to close it and deal with it later. A 2024 survey by Statista found that 62% of iPhone users have never deleted photos in bulk, and the most common reason cited was "too many to sort through." The problem compounds over time: every month you wait adds another 400–600 photos to the pile.
The core issue is not the volume itself — it is the lack of a starting point. When every photo looks equally important or equally unimportant, you have no way to prioritize. You scroll to a random month, stare at 30 thumbnails, and close the app. This is why traditional grid-based browsing fails at scale. Grids are designed for browsing a manageable set, not for processing thousands of items. Research on choice overload from Stanford University confirms that when people face too many similar options, they either make impulsive decisions or defer the decision entirely.
There is also a storage dimension. A 10,000-photo library typically consumes 30–50 GB, depending on whether you shoot in HEIF, JPEG, or ProRAW. Add videos and the number climbs much higher. When your iPhone storage fills up, you start getting the dreaded "Storage Almost Full" notification, and the Photos app itself becomes sluggish. At that point, cleaning up is no longer optional — it is necessary to keep using your phone normally. For a deeper look at storage issues, see our guide on what to do when your iPhone storage is full.
The solution is not to find a magic "sort" button. It is to break the problem into phases, each with a clear decision rule, so you never have to look at 10,000 photos at once. The rest of this guide lays out exactly how to do that.
The Swipe Method for Large Libraries
The swipe method works because it eliminates multi-select paralysis. Instead of choosing which photos to delete from a grid of 50 thumbnails, you see one full-screen photo at a time and make a single binary call: keep or delete. This interaction pattern reduces the cognitive cost of each decision to nearly zero, which is critical when you have thousands of decisions ahead of you.
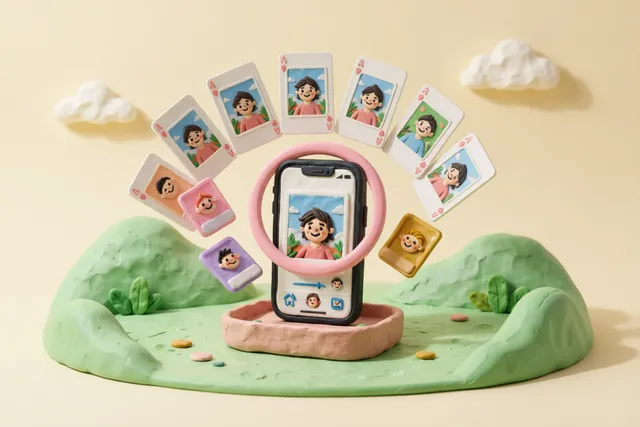
Here is the workflow. Open TidyByte and pick a starting point — your oldest unsorted month works best because it contains the most forgotten content. Swipe left on a photo to mark it for deletion. Swipe right to keep it. Each swipe advances to the next photo automatically. There is no zooming, no long-pressing, no checkbox tapping. You see the photo, you decide, you move on.
Why one-at-a-time beats grid review
The grid view in the Photos app seems efficient because you see many photos at once. But it introduces hidden time costs: you have to tap to zoom, pinch to compare, long-press to preview, and tap-select with a blue checkmark. Each of those micro-interactions adds 2–3 seconds. Over 10,000 photos, that adds up to hours of wasted motion. Sequential review — one photo, one decision, next — is faster because the interface stays constant and your decision criteria stay constant.
At a typical pace of 10–12 decisions per minute, you can process 600 photos in an hour. That means a 10,000-photo library takes roughly 15–17 hours of total swipe time. That sounds like a lot, but spread across 15–20 minute sessions over three weeks, it works out to one short session per day. Most people find they can do more than one session per day once they get into a rhythm, cutting the total calendar time to under two weeks. For a comparison of different review speeds, see our breakdown of how swipe-to-clean works on iPhone.
Using Smart Categories Effectively
Before you start swiping through your entire library, you can eliminate a significant chunk of it with zero emotional effort. Smart categories group photos by type so you can batch-review each group with a single, consistent rule. This is the highest-leverage phase of the entire cleanup because the decisions are mechanical, not personal.
TidyByte detects several categories automatically:
- Exact duplicates — identified by SHA-256 file hash. These are byte-for-byte identical copies. Safe to delete in one tap with zero false positives.
- Near-duplicates — detected using Apple's Vision framework feature prints. Three nearly identical shots of the same sunset? Keep the sharpest, delete the rest.
- Blurry photos — flagged by on-device sharpness analysis. Blurry shots are almost never worth keeping, so this category can clear hundreds of photos in minutes.
- Screenshots — automatically identified and grouped. Most screenshots are ephemeral reference material that loses relevance within days.
- Live Photos — surfaced so you can convert them to stills or delete the video component to reclaim 2–5 MB per photo.
- Large files — sorted by file size so you can target the biggest storage consumers first.
In a typical library of 10,000 photos, smart categories surface 2,000–3,000 items for batch review. At the batch-delete pace of 30–50 photos per minute, this phase takes 1–2 hours and removes roughly 20–30% of your library. That means you enter the general swipe phase with 7,000 photos instead of 10,000 — a meaningful reduction in both time and mental effort.
Quick stat
The average iPhone library contains 18–25% near-duplicates and blurry photos. Removing them first cuts your review time by roughly one-quarter before you even start the general swipe pass.
Creating a Personal Album System
The biggest mistake people make with photo organization is treating cleanup and album creation as two separate tasks. You spend hours deleting junk, then plan to "organize the keepers into albums later." Later never comes. The better approach is to build albums while you swipe, so every keeper gets filed the moment you decide it is worth keeping.
In TidyByte, after you swipe right to keep a photo, you can add it to an existing album or create a new one with a single tap. This turns a two-pass process into one. The context is fresh — you just looked at the photo and decided it mattered — so assigning it to an album takes a second instead of a minute of deliberation.
Albums that actually work
You do not need a complex folder hierarchy. Most people are well served by five to ten albums. Here is a structure that covers the majority of use cases:
- People — portraits, family gatherings, friends. The photos you come back to most often.
- Travel — one album per trip or one per year, depending on how much you travel.
- Documents — IDs, receipts, contracts, whiteboards. Keeps them searchable and separate from personal photos.
- Favorites — the 50–100 photos you would show someone or use as wallpaper.
- Projects — home renovation progress, cooking experiments, hobby documentation, anything with a specific purpose.
Photos that do not fit a named album can stay in your camera roll. The goal is not to categorize every photo — it is to make your best photos findable in under five seconds. If you create too many albums, you just move the organizational problem from one place to another. Keep it simple, and you will actually maintain it. For more on organizing the keepers, see our full guide on how to organize iPhone photos.
Time Estimates for Different Library Sizes
One of the most common questions about how to organize thousands of photos on iPhone is simply: how long will this take? The answer depends on your library size, your review method, and whether you use smart categories to pre-sort. Here are realistic time estimates based on actual usage patterns:
| Library Size | Smart Categories Phase | General Swipe Phase | Total Time |
|---|---|---|---|
| 1,000 photos | 10–20 min | 1–1.5 hrs | 1.5–2 hrs |
| 5,000 photos | 30–50 min | 5–7 hrs | 6–8 hrs |
| 10,000 photos | 1–2 hrs | 8–12 hrs | 10–15 hrs |
| 20,000 photos | 2–3 hrs | 18–25 hrs | 20–30 hrs |
| 50,000+ photos | 4–6 hrs | 50–70 hrs | 55–80 hrs |
These numbers assume a swipe pace of 10–12 photos per minute for the general review phase and 30–50 per minute for the batch-review phase with smart categories. Your actual speed may vary. People who are decisive tend to move faster; people who linger on each photo tend to move slower. The important thing is not raw speed — it is consistency. Fifteen minutes a day for three weeks will get you further than a single exhausting eight-hour session.
For very large libraries (50,000+), consider a phased approach: focus on the most recent year first, then work backward. Your most recent photos are the ones you are most likely to need, and they are also the ones with the most duplicates and junk because you have not reviewed them at all. Older years often have a higher ratio of intentional photos because the junk has already been pruned naturally over time.
Preventing Future Clutter
Organizing 10,000 photos is a significant effort. Without a maintenance habit, you will be back at the same number within 12–18 months. The average iPhone user adds 5,000–8,000 photos per year. Prevention is far cheaper than cleanup because the backlog never gets large enough to feel overwhelming.
The weekly 5-minute pass
Pick a consistent time — Sunday evening, Monday morning, whatever fits your routine — and spend five minutes reviewing the photos you took that week. At typical usage of 10–30 photos per week, this takes two to three minutes. Delete the obvious junk, add keepers to albums, and you are done. The weekly pass works because the volume is small enough that you never feel overwhelmed, and the context is fresh enough that decisions are instant.
Delete at the moment of capture
If you take a blurry photo, delete it immediately. If you screenshot something for a one-time reference, delete it after you use it. The best photo to organize is the one that never enters your backlog. This habit alone prevents 500–1,000 low-value photos from accumulating each year. It takes zero extra time because you are already looking at the photo.
Quarterly deep review
Every three months, do a 20–30 minute session to review the past quarter. By this point you have enough emotional distance to delete photos that felt important at the time but are not worth keeping long-term. This is also the time to check for new duplicates (common after restoring from backup or re-importing), prune albums that have grown unwieldy, and check your storage usage. TidyByte's storage dashboard gives you a category-by-category breakdown so you can see exactly where your space is going.
Maintenance schedule
- Weekly: Review new photos, delete junk, add keepers to albums. 5 minutes.
- Monthly: Run duplicate and blurry photo detection. 10–15 minutes.
- Quarterly: Deep review of the past three months, prune albums, check storage. 20–30 minutes.
- Annually: Review older years for photos you no longer need. Free up storage for the year ahead.
Frequently asked questions
How do I organize a huge photo library on iPhone?
Start by clearing low-impact categories in bulk — exact duplicates, blurry shots, and screenshots — which can eliminate 15–30% of a large library in a single session. Then work through the remaining photos using a binary swipe workflow, one photo at a time, so each decision is fast and low-effort. Assign keepers to albums as you go rather than doing a separate organization pass afterward. This phased approach is how to organize thousands of photos on iPhone without burning out.
What is the best way to sort thousands of photos?
The best approach is to sort by category first, then chronologically within each category. Use automated detection to group duplicates, blurry photos, and screenshots for batch deletion, then review the remaining photos month by month. This method reduces cognitive load because each review phase uses a consistent decision rule instead of switching between different criteria for every photo.
How long does it take to organize 10,000 photos?
Using a swipe-based workflow with smart category pre-sorting, expect roughly 10–15 hours of total review time for 10,000 photos. Smart categories handle the first 2,000–3,000 photos in 1–2 hours, and the remaining 7,000 photos take about 8–12 hours at a pace of 10–12 decisions per minute. Spreading this across 15–20 minute sessions over two to three weeks produces better results than a single marathon session because your decision quality stays high throughout.
Can TidyByte help organize large photo libraries?
Yes. TidyByte is designed specifically for large libraries. It groups photos into smart categories — duplicates, blurry shots, screenshots, Live Photos, and large files — so you can batch-delete low-value photos before swiping through the rest. The swipe interface loads one photo at a time to prevent decision fatigue, and you can add keepers to albums directly without switching to the Photos app. Progress is saved automatically, so you can organize across multiple sessions without losing your place.
Should I organize photos by date or event?
For most people, event-based albums work better than strict date-based folders because they match how you actually look for photos — "that trip to Kyoto" rather than "March 15–22, 2025." However, using date as a secondary filter during review is efficient because photos taken around the same time are usually contextually related, making batch decisions faster. The ideal system uses dates during review and events for the final album structure.
Ready to clean up your photo library?
TidyByte is free, runs 100% on your device, and takes just minutes to use.